Top 5 Anti virus for Ubuntu


Generally Ubuntu Linux is hardly effected by virus and the reason is its structure and strong community support, any loopholes are worked immediately. For every new virus, its solution is out within two hours thus preventing it to do any further damage. Linux antivirus are also effective against the Windows virus and they are removed if they enter your systems through external hard drive, internet etc.

Also see Top 10 FAQ about Linux and FOSS.  

Top 5 Ubuntu Linux antivirus I recommend are:

1. ClamAV Antivirus 
ClamAV is the most popular open source anti-virus software and it is available for both Ubuntu and Kubuntu. Its GUI interface is called Clamtk.
It can be install from the software center or in terminal type
$sudo apt-get install clamav clamtk


2. Free Avast Linux Home Edition
This is Free version of popular proprietary Antivirus Avast. It requires online  registration for 1 year use. It is not available for commercial use.
Download Avast Linux Home Edition and register here. Once you install it and run for the first time, you will be asked for the key.

3. AVG Antivirus 
This is another free antivirus available for Ubuntu. Download it hereAVG has over 110 million users. Once you install it, you need to start AVG with super user privileges. To do so open the terminal and type
$sudo avggui

4. F-PROT Antivirus 
It is available for all Linux workstations and has to installed from from .tar file. Download F-PROT.To install follow these steps:
     -> Extract the tar file.
     -> Open terminal and change drive to the extracted folder.
     -> Type sudo ./install and press Y to continue.
     -> Press Y for all other prompts and Enter.

5. BitDefender

It is another proprietary antivirus software available for Ubuntu for non-commercial use.
You have to add the repository.
System - Administration - Software Sources, click on the 'Other Software' (previously 'Third Party Software') tab. Now click on 'Add' and enter
deb http://download.bitdefender.com/repos/deb/ bitdefender non-free  

Close and press Reload button.In terminal paste  the following command.
$wget http://download.bitdefender.com/repos/deb/bd.key.asc 
$sudo apt-key add bd.key.asc
  
To install the GUI type the following command in terminal.
$sudo apt-get install bitdefender-scanner-gui

Now access it from Applications ->System Tools -> BitDefender Scanner.

INSTALL LATEST CINNAMON 1.6.4 IN UBUNTU 12.10/12.04/LINUX MINT (NEW RELEASE)

Install Latest Cinnamon 1.6.4 in Ubuntu 12.10 Quantal/Ubuntu 12.04 Precise and Cinnamon 1.4 in Ubuntu 11.10 Oneiric/Linux Mint 12

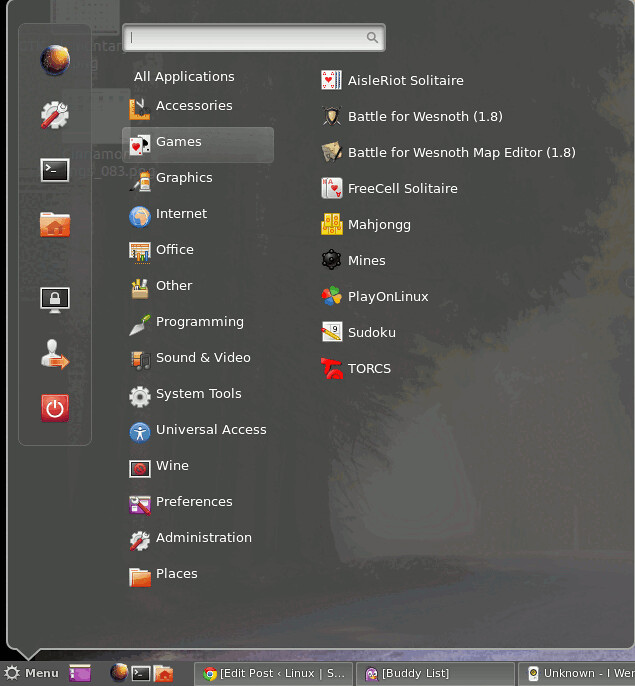
Cinnamon team released new version of Cinnamon with many bugs fixes, theme improvements, enhancements to the bottom panel, also include cinnamon setting manager. Latest Version is a maintenance release which adds polish and tackles important issues from the previous release.
cinnamon

What's new in 1.6.4 Version?
  • When the magnifier is enabled some categories of the menu do not appear correctly
  • Accessibility: Magnifier now displays context menus correctly
  • Windows management: When a window requires attention (typically, when you open a file with an editor that is located on another workspace), Cinnamon moves to that workspace by default rather than bringing the window to you. This behaviour is also configurable in Cinnamon Settings -> Windows.
  • Menu: Items from sub-categories are now displayed
  • Menu: Searches now apply to menu item ids (i.e. the name of the .desktop file)
  • Settings: Made keybindings page compatible with non-Ubuntu based distributions
  • Updated translations
Also Previous Release Fixes:
  • New "keyboard bindings" page in cinnamon settings
  • Fixed alignment in notification popups
  • Prevent non-gtk-systray-icons from disappearing on redisplay
  • Window-list applet: Fix regression to close-all and close-other
  • menu applet fix: get_key_focus was triggering a changed signal on the search text box, which was resetting categories (thinking a search was being performed).
  • Don’t hide Spotify from system tray
  • updated translations
  • altTab: Fix thumbnail size calculation for some dual-head setups
  • [Expo] Remove clip – fixes dual-display issue with clipped workspace ……display
  • Fixed conky/mintupload windows appearing in alt-tab
  • Use bottomMonitor to position bottom-aligned hot corner.
  • Alt-tab: Icons + Thumbnails as default choice
  • Enabled notifications and settings applets by default
  • Ignore the GNOME setting for handling the desktop

To Install Latest Cinnamon in Ubuntu 12.10/12.04/11.10 open Terminal (Press Ctrl+Alt+T) and copy the following commands in the Terminal:
  • sudo add-apt-repository ppa:gwendal-lebihan-dev/cinnamon-stable
  • sudo apt-get update
  • sudo apt-get install cinnamon
Source: Cinnamon

Howto: Upgrade To Ubuntu 13.04 Raring Ringtail From 12.04, 12,10 | Desktop & Server

Updated 05-04-2013: Ubuntu 13.04 Raring Ringtail Will Be Released Soon, If You Have Ubuntu 12,10, 12.04 Precise Pangolin Or Older Version Of Ubuntu Installed On Your System, And You Want To Upgrade To This New Release,  You Can Do It By Following These Instructions.
Important: The most important things when it comes to upgrading are:
  1. That your data is safe
  2. That you end up with a fully functional system
Your personal data is the most valuable thing in your computer. If anything happens and you break your operating system, it’s not a problem, it can be reinstalled. If you lose your data… that’s a different story.
To be safe:
  1. Make a full backup of your data on an external device (USB stick or CD/DVD).
  2. Download and burn the liveCD of the newer release, and check that your hardware is fully functional with it.

- Desktop Upgrade:


a- Update the system before to upgrade:
Before to upgrade, we need to update the system, press Ctrl+Alt+T, and enter the following command:
sudo apt-get update && sudo apt-get dist-upgrade
  • b- Upgrade:
To upgrade, open terminal and enter the following command:
sudo update-manager -d
Update Manager should open up and tell you: New distribution release ’13.04‘ is available ( See screenshot bellow).
upgrade-ubuntu13.04
Then click : Upgrade
upgrade-2A new screen will appear asking you if you want to start Upgrade:
upgrade-4
Press start upgrade.
Now don`t close your computer until the upgrade is finished.
upgrade5

- Server Upgrade:

To upgrade from Ubuntu 12.10 on a server system to Ubuntu 13.04:
1- install the update-manager-core package if it is not already installed:
sudo apt-get install update-manager-core
2- Edit /etc/update-manager/release-upgrades and set Prompt=normal;
3- Launch the upgrade tool with the command
sudo do-release-upgrade -d
and follow the on-screen instructions.
Important: This is a beta release. Do not install it on production machines. The final stable version will be released 26th of April 2013.
For questions please refer to our Q/A forum at : http://ask.unixmen

Upgrade ubuntu 12.10 to ubuntu 13.04 beta (Desktop and Server)


The Ubuntu team is pleased to announce the final beta release of Ubuntu 13.04 Desktop, Server, Cloud, and Core products.
Codenamed “Raring Ringtail”, 13.04 continues Ubuntu’s proud tradition of integrating the latest and greatest open source technologies into a high-quality, easy-to-use Linux distribution. The team has been hard at work through this cycle, introducing new features and fixing bugs.
Ubuntu 13.04 is the version of the Ubuntu operating system planned to be released on April 25, 2013. The common name given to this release is “Raring Ringtail”.
Ubuntu Desktops 12.10 to 13.04
You can easily upgrade over the network with the following procedure.
Run the update-manager -d application from the Unity Dash or a command line
In Update Manager, click the Settings… button, and enter your password to start the Software Sources application.
Select the sub menu Updates from the Software Sources application.
Confirm the “Notify me of a new Ubuntu version:” option is set to “For any new version”, and change it if otherwise.
Close the Software Sources application and return to Update Manager.
In Update Manager, click the Check button to check for new updates.
If there are any updates to install, use the Install Updates button to install them, and press Check again after that is complete.
A message will appear informing you of the availability of the new release.
Click Upgrade.
Follow the on-screen instructions.
For Ubuntu 12.10 Servers
Install update-manager-core if it is not already installed:
sudo apt-get install update-manager-core                                                                                   
Launch the upgrade tool:
do-release-upgrade -d                                                                                                                 

static IP address to the server Linux

[1]Set static IP address to the server, DHCP is not recommended if you use as a server, Change it.
[root@dlp ~]# 
vi /etc/sysconfig/network-scripts/ifcfg-eth0
DEVICE=eth0
HWADDR=00:50:43:00:3B:AE
# change

ONBOOT=
yes

# add lines as follows

BOOTPROTO=none
# this server's IP address

IPADDR=10.0.0.30
# subnet mask

NETMASK=255.255.255.0
TYPE=Ethernet
# default gateway

GATEWAY=10.0.0.1
# DNS server's IP address

DNS1=10.0.0.10
IPV6INIT=no
USERCTL=no
[root@dlp ~]# 
/etc/rc.d/init.d/network restart 

Shutting down interface eth0: 
[  OK  ]

Shutting down loopback interface:
[  OK  ]

Bringing up loopback interface: 
[  OK  ]

Bringing up interface eth0:
[  OK  ]

[root@dlp ~]# 
chkconfig network on 

[root@dlp ~]# 
ifconfig 

eth0
Link encap:Ethernet HWaddr 00:0C:29:D8:7C:06

inet addr:10.0.0.30 Bcast:10.0.0.255 Mask:255.255.255.0

inet6 addr: fe80::20c:29ff:fed8:7c06/64 Scope:Link

UP BROADCAST RUNNING MULTICAST MTU:1500 Metric:1

RX packets:885 errors:0 dropped:0 overruns:0 frame:0

TX packets:743 errors:0 dropped:0 overruns:0 carrier:0

collisions:0 txqueuelen:1000

 
RX bytes:83054 (81.1 KiB) TX bytes:113706 (111.0 KiB)
lo
Link encap:Local Loopback

inet addr:127.0.0.1 Mask:255.0.0.0

inet6 addr: ::1/128 Scope:Host

UP LOOPBACK RUNNING MTU:16436 Metric:1

RX packets:0 errors:0 dropped:0 overruns:0 frame:0

TX packets:0 errors:0 dropped:0 overruns:0 carrier:0

collisions:0 txqueuelen:0

RX bytes:0 (0.0 b) TX bytes:0 (0.0 b)

[2]Disable IPv6 if you don't need it.
[root@dlp ~]# 
ifconfig 

eth0
Link encap:Ethernet HWaddr 00:0C:29:D8:7C:06

inet addr:10.0.0.30 Bcast:10.0.0.255 Mask:255.255.255.0

inet6 addr: fe80::20c:29ff:fed8:7c06/64 Scope:Link

UP BROADCAST RUNNING MULTICAST MTU:1500 Metric:1

RX packets:885 errors:0 dropped:0 overruns:0 frame:0

TX packets:743 errors:0 dropped:0 overruns:0 carrier:0

collisions:0 txqueuelen:1000

 
RX bytes:83054 (81.1 KiB) TX bytes:113706 (111.0 KiB)
lo
Link encap:Local Loopback

inet addr:127.0.0.1 Mask:255.0.0.0

inet6 addr: ::1/128 Scope:Host

UP LOOPBACK RUNNING MTU:16436 Metric:1

RX packets:0 errors:0 dropped:0 overruns:0 frame:0

TX packets:0 errors:0 dropped:0 overruns:0 carrier:0

collisions:0 txqueuelen:0

RX bytes:0 (0.0 b) TX bytes:0 (0.0 b)

[root@dlp ~]# 
echo "install ipv6 /bin/true" > /etc/modprobe.d/disable-ipv6.conf 
[root@dlp ~]# 
reboot
# reboot
[root@dlp ~]# 
ifconfig 

eth0
Link encap:Ethernet HWaddr 00:0C:29:D8:7C:06

inet addr:10.0.0.30 Bcast:10.0.0.255 Mask:255.255.255.0

UP BROADCAST RUNNING MULTICAST MTU:1500 Metric:1

RX packets:885 errors:0 dropped:0 overruns:0 frame:0

TX packets:743 errors:0 dropped:0 overruns:0 carrier:0

collisions:0 txqueuelen:1000

 
RX bytes:83054 (81.1 KiB) TX bytes:113706 (111.0 KiB)
lo
Link encap:Local Loopback

inet addr:127.0.0.1 Mask:255.0.0.0

UP LOOPBACK RUNNING MTU:16436 Metric:1

RX packets:0 errors:0 dropped:0 overruns:0 frame:0

TX packets:0 errors:0 dropped:0 overruns:0 carrier:0

install DHCP server in Linux

Configure DHCP ( Dynamic Host Configuration Protocol ) Server. If you make your linux computer DHCP server, it's neccesarry to disable DHCP function on router in LAN.
*#*-Install and configure DHCP

root@dlp:~# aptitude -y install dhcp3-server

root@dlp:~# vi /etc/dhcp/dhcpd.conf


# line 13: specify domain name

option domain-name
"server.world"
;
# line 14: specify nameserver's hostname or IP address

option domain-name-servers
dlp.server.world
;
# line 21: uncomment

authoritative;
# add at the last

# specify network address and subnet-mask

subnet 10.0.0.0 netmask 255.255.255.0 {
# specify default gateway

option routers 10.0.0.1;

# specify subnet-mask

option subnet-mask 255.255.255.0;

# specify the range of leased IP address

range dynamic-bootp 10.0.0.200 10.0.0.254;

}


root@dlp:~# /etc/init.d/isc-dhcp-server start

Starting ISC DHCP server: dhcpd.

Install Virtual Machine Manager (Linux)

[1] Install some packages first.
root@dlp:~#aptitude -y install virt-manager hal 
[2] Start X Window System and run 'Virtual Machine Manager'.
[3] Connect to QEMU first and Click 'New' button (PC icon) and open a wizard to create a new Virtual Machine.
[4] Specify the name of virtual machine and installation source. This example selects local media.
[5] Select Installation media or ISO image, and specify OS type and version.
[6] Specify amount of memories and number of virtula CPUs.
[7] Specify amount of disks.
[8] Open 'Advanced options' and make sure the settings for networking or architecture are correct.
[9] Installation starts.
[10]Installation finished and Fedora 14 started. .
 

yum command: Update / Install Packages Under Redhat Enterprise / CentOS Linux Version 5.x


How do I use yum command to update and patch my Red hat Enterprise Linux / CentOS Linux version 5.x server via RHN / Internet? Can I use up2date command under RHEL 5?

up2date command was part of RHEL v4.x or older version. You need to use yum command to update and patch the system using RHN or Internet. Use yum command to install critical and non-critical security updates as well as binary packages. Login as the root user to install and update the system.

Task: Register my system with RHN

To register your system with RHN type the following command and just follow on screen instructions (CentOS user skip to next step):

# rhn_register
WARNING! These examples only works with RHEL / CentOS Linux version 5.x or above

Task: Display list of updated software (security fix)

Type the following command at shell prompt:
# yum list updates

Task: Patch up system by applying all updates

To download and install all updates type the following command:
# yum update

Task: List all installed packages

List all installed packages, enter:

# rpm -qa
# yum list installed

Find out if httpd package installed or not, enter:
# rpm -qa | grep httpd*
# yum list installed
httpd

Task: Check for and update specified packages

# yum update {package-name-1}
To check for and update httpd package, enter:
# yum update httpd

Task: Search for packages by name

Search httpd and all matching perl packages, enter:

# yum list {package-name}
# yum list {regex}
# yum list httpd
# yum list perl*
Sample output:
Loading "installonlyn" plugin
Loading "security" plugin
Setting up repositories
Reading repository metadata in from local files
Installed Packages
perl.i386                                4:5.8.8-10.el5_0.2     installed
perl-Archive-Tar.noarch                  1.30-1.fc6             installed
perl-BSD-Resource.i386                   1.28-1.fc6.1           installed
perl-Compress-Zlib.i386                  1.42-1.fc6             installed
perl-DBD-MySQL.i386                      3.0007-1.fc6           installed
perl-DBI.i386                            1.52-1.fc6             installed
perl-Digest-HMAC.noarch                  1.01-15                installed
perl-Digest-SHA1.i386                    2.11-1.2.1             installed
perl-HTML-Parser.i386                    3.55-1.fc6             installed
.....
.......
..
perl-libxml-perl.noarch                  0.08-1.2.1             base
perl-suidperl.i386                       4:5.8.8-10.el5_0.2     updates 

Task: Install the specified packages [ RPM(s) ]

Install package called httpd:

# yum install {package-name-1} {package-name-2}
# yum install httpd

Task: Remove / Uninstall the specified packages [ RPM(s) ]

Remove package called httpd, enter:

# yum remove {package-name-1} {package-name-2}
# yum remove httpd

Task: Display the list of available packages

# yum list all

Task: Display list of group software

Type the following command:

# yum grouplist
Output:
Installed Groups:
   Engineering and Scientific
   MySQL Database
   Editors
   System Tools
   Text-based Internet
   Legacy Network Server
   DNS Name Server
   Dialup Networking Support
   FTP Server
   Network Servers
   Legacy Software Development
   Legacy Software Support
   Development Libraries
   Graphics
   Web Server
   Ruby
   Printing Support
   Mail Server
   Server Configuration Tools
   PostgreSQL Database
Available Groups:
   Office/Productivity
   Administration Tools
   Beagle
   Development Tools
   GNOME Software Development
   X Software Development
   Virtualization
   GNOME Desktop Environment
   Authoring and Publishing
   Mono
   Games and Entertainment
   XFCE-4.4
   Tomboy
   Java
   Java Development
   Emacs
   X Window System
   Windows File Server
   KDE Software Development
   KDE (K Desktop Environment)
   Horde
   Sound and Video
   FreeNX and NX
   News Server
   Yum Utilities
   Graphical Internet
Done

Task: Install all the default packages by group

Install all 'Development Tools' group packages, enter:

# yum groupinstall "Development Tools"

Task: Update all the default packages by group

Update all 'Development Tools' group packages, enter:

# yum groupupdate "Development Tools"

Task: Remove all packages in a group

Remove all 'Development Tools' group packages, enter:

# yum groupremove "Development Tools"

Task: Install particular architecture package

If you are using 64 bit RHEL version it is possible to install 32 packages:

# yum install {package-name}.{architecture}
# yum install mysql.i386

Task: Display packages not installed via official RHN subscribed repos

Show all packages not available via subscribed channels or repositories i.e show packages installed via other repos:

# yum list extras
Sample output:
Loading "installonlyn" plugin
Loading "security" plugin
Setting up repositories
Reading repository metadata in from local files
Extra Packages
DenyHosts.noarch                         2.6-python2.4          installed
VMwareTools.i386                         6532-44356             installed
john.i386                                1.7.0.2-3.el5.rf       installed
kernel.i686                              2.6.18-8.1.15.el5      installed
kernel-devel.i686                        2.6.18-8.1.15.el5      installed
lighttpd.i386                            1.4.18-1.el5.rf        installed
lighttpd-fastcgi.i386                    1.4.18-1.el5.rf        installed
psad.i386                                2.1-1                  installed
rssh.i386                                2.3.2-1.2.el5.rf       installed

Task: Display what package provides the file

You can easily find out what RPM package provides the file. For example find out what provides the /etc/passwd file:

# yum whatprovides /etc/passwd
Sample output:
Loading "installonlyn" plugin
Loading "security" plugin
Setting up repositories
Reading repository metadata in from local files
setup.noarch                             2.5.58-1.el5           base
Matched from:
/etc/passwd
setup.noarch                             2.5.58-1.el5           installed
Matched from:
/etc/passwd
You can use same command to list packages that satisfy dependencies:

# yum whatprovides {dependency-1} {dependency-2}

Refer yum command man page for more information:

# man yum